3. Create a Collection
A Collection is a category of templates with a specific scarcity amount, in which your users can mint NFTs. For example, if we have a shoe template, you could create a Magic Flaming Shoe Collection with a scarcity of 10 for your game. To be able to start viewing and creating a collection, you should click on your added project, and you should be redirected to your project management page.
[Figure 3.1]
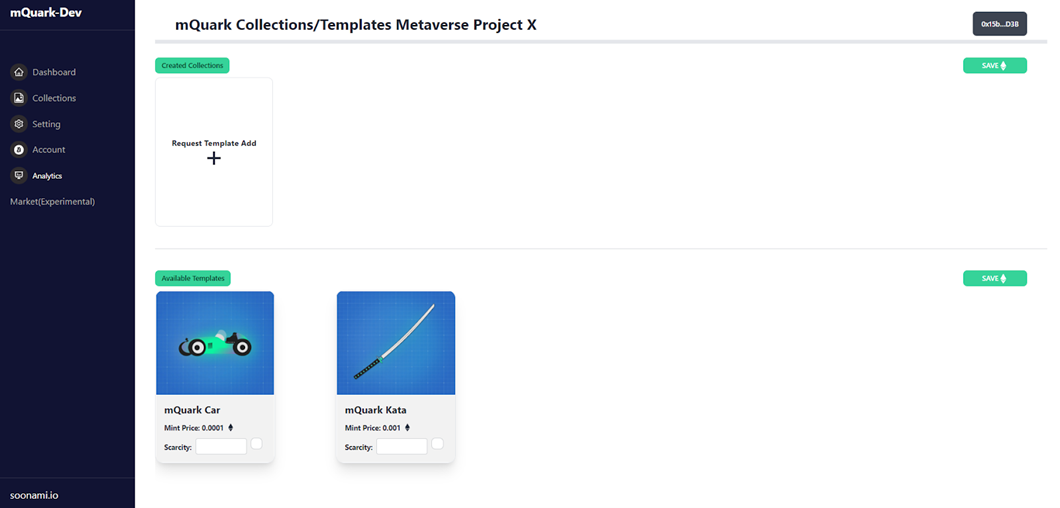
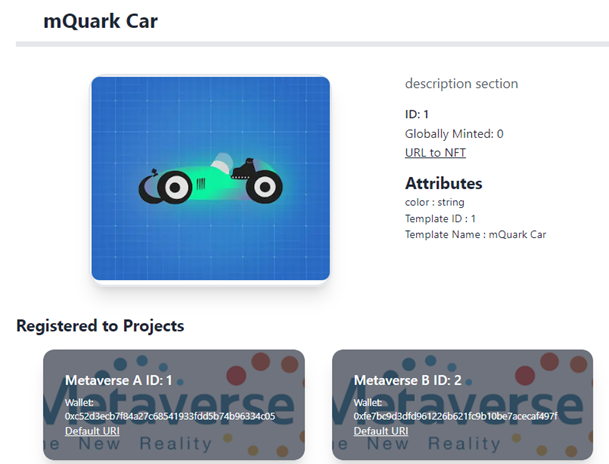
In the above section in figure 3.1, the Unbounded team has already created many “Templates”. Think of a template as a type of blueprint in which you forge your collections. Every available template will be listed there, including the mint price. When clicking on every template, you will see its ID, description, default attributes, a link to its metadata, and which projects have been utilised by other businesses or metaverses.
[Figure 3.2]
Since all information is available on the Smart Contracts and GraphQL, it would be extremely challenging to see and find these data there.
In figure 3.1, you should set a scarcity amount, this will be your collection’s total supply for your project, and then the checkbox should be selected. Multiple collections can be created at the same time. Click the “Save” button and send the transaction. When the transaction has successfully been mined, refresh the page and see your first collection in the above section.
[Figure 3.3]
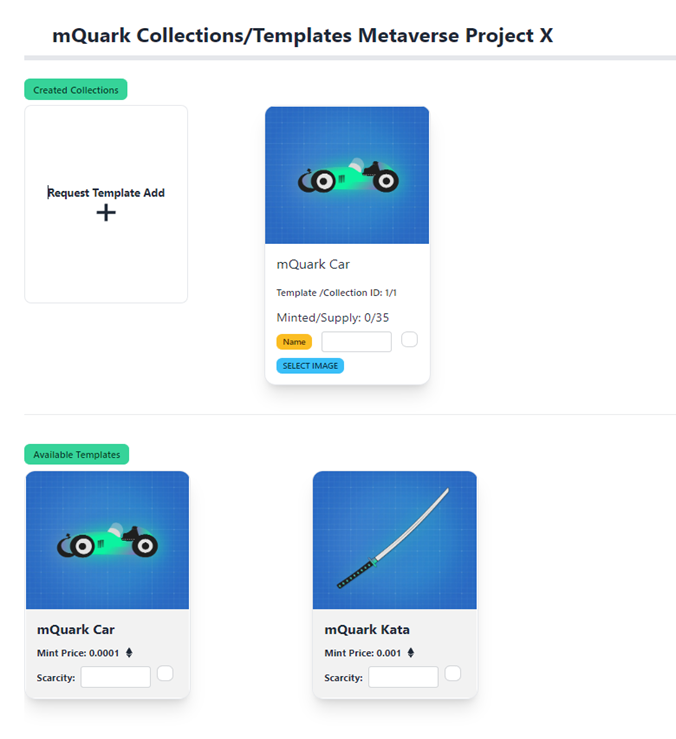
Also, as you can see, the newly created collection has “Name” and “Select Image” sections where you can set a collection name and collection image for it. This editing process can be done using the Developer Portal only because Smart Contract requires signed data which is signed by an admin wallet.
To view your collection data, simply click on your collection.
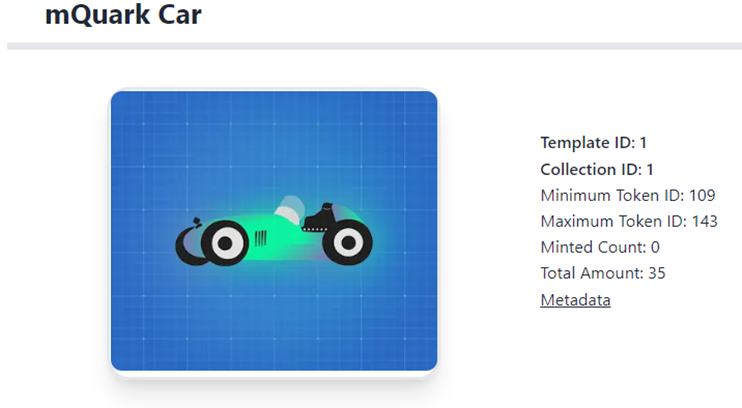
[Figure 3.4]